I made the TOP of my WEDDING dress

Hello and happy Friday!
It’s been a couple of months since ...I got MARRIED!!!
I thought I wouldn’t be busy enough being my own wedding planner, so I decided to be the florist, hair stylist (with help from my friends), makeup artist and ... seamstress of my own wedding top and veil.
I’ll start from the beginning of the story. In December 2018, I bought a dress online from one of my favourite stores - BHLDN (which I’ve never physically been to).
This is the dress I bought:

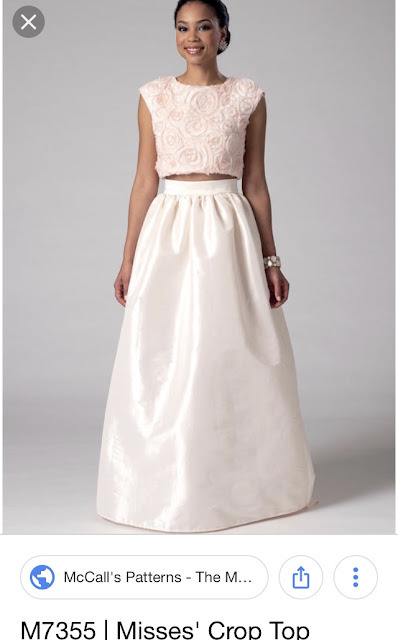


This is the dress I bought:

Felix dress by Heartloom
In the above photo, the dress has been altered (by me). Before I stitched the sides in an inch or so, the dress was quite baggy on me.
I absolutely love this dress. The back is super adorable with a keyhole cutout. The lace has little fringes (I forget what that’s called). It’s an ivory colour. So beautiful. No need to go try on more dresses, right? Well, for some reason, I thought it would be fun to go out for a day of trying on dresses in cute little boutiques. It was very fun, but I also tried on a dress that I would have never tried on. It was a two piece, fitted lace dress by Theia. I love Theia but I just never pictured myself in a two piece. Well, I fell in love with it. AND it was out of my price range mostly because I had already bought another dress.
Fast forward a day or so, and my friend texted me to say she found the two piece Theia on a sample sale basically in my size at a different boutique. I called them right away and they said their website wasn’t completely updated. They had the skirt but not the top. I booked an appointment and within a few days, I bought the skirt. The girl at the store gave me ideas of what tops I could pair with the skirt. If I had ordered a new matching top, the lace colour would be a bit brighter than the older lace skirt.
So, off I went to consignment shops on Main Street and other places like Aritzia. Maybe a silk cami would look cute. I brought one home and the shade of white didn’t quite match.
Now what? I have a dress that’s too big and needs alterations and I have a skirt that also needs alterations.
That’s when I headed out with skirt in hand to a giant fabric store that sells bridal fabric. I thought, ‘I’ve taken Intro to Sewing 🧵, surely I can make a top for this skirt!’ This was five months before our wedding.
I bought this pattern:

I believe I made four versions of this top. For the first version, I used some scrap fabric I had lying around. See below:
 |
| The top came out way shorter than expected, but look at my skirt! |
For the second version, I opted for a satin fabric and a polyester lining to practice sewing on slippery fabric. I also made this next top on the bias (which was a first):

After this version, I bought a dressmaker’s ham to smooth out the darts. I also learned many techniques on YouTube to make the final top look more professional.
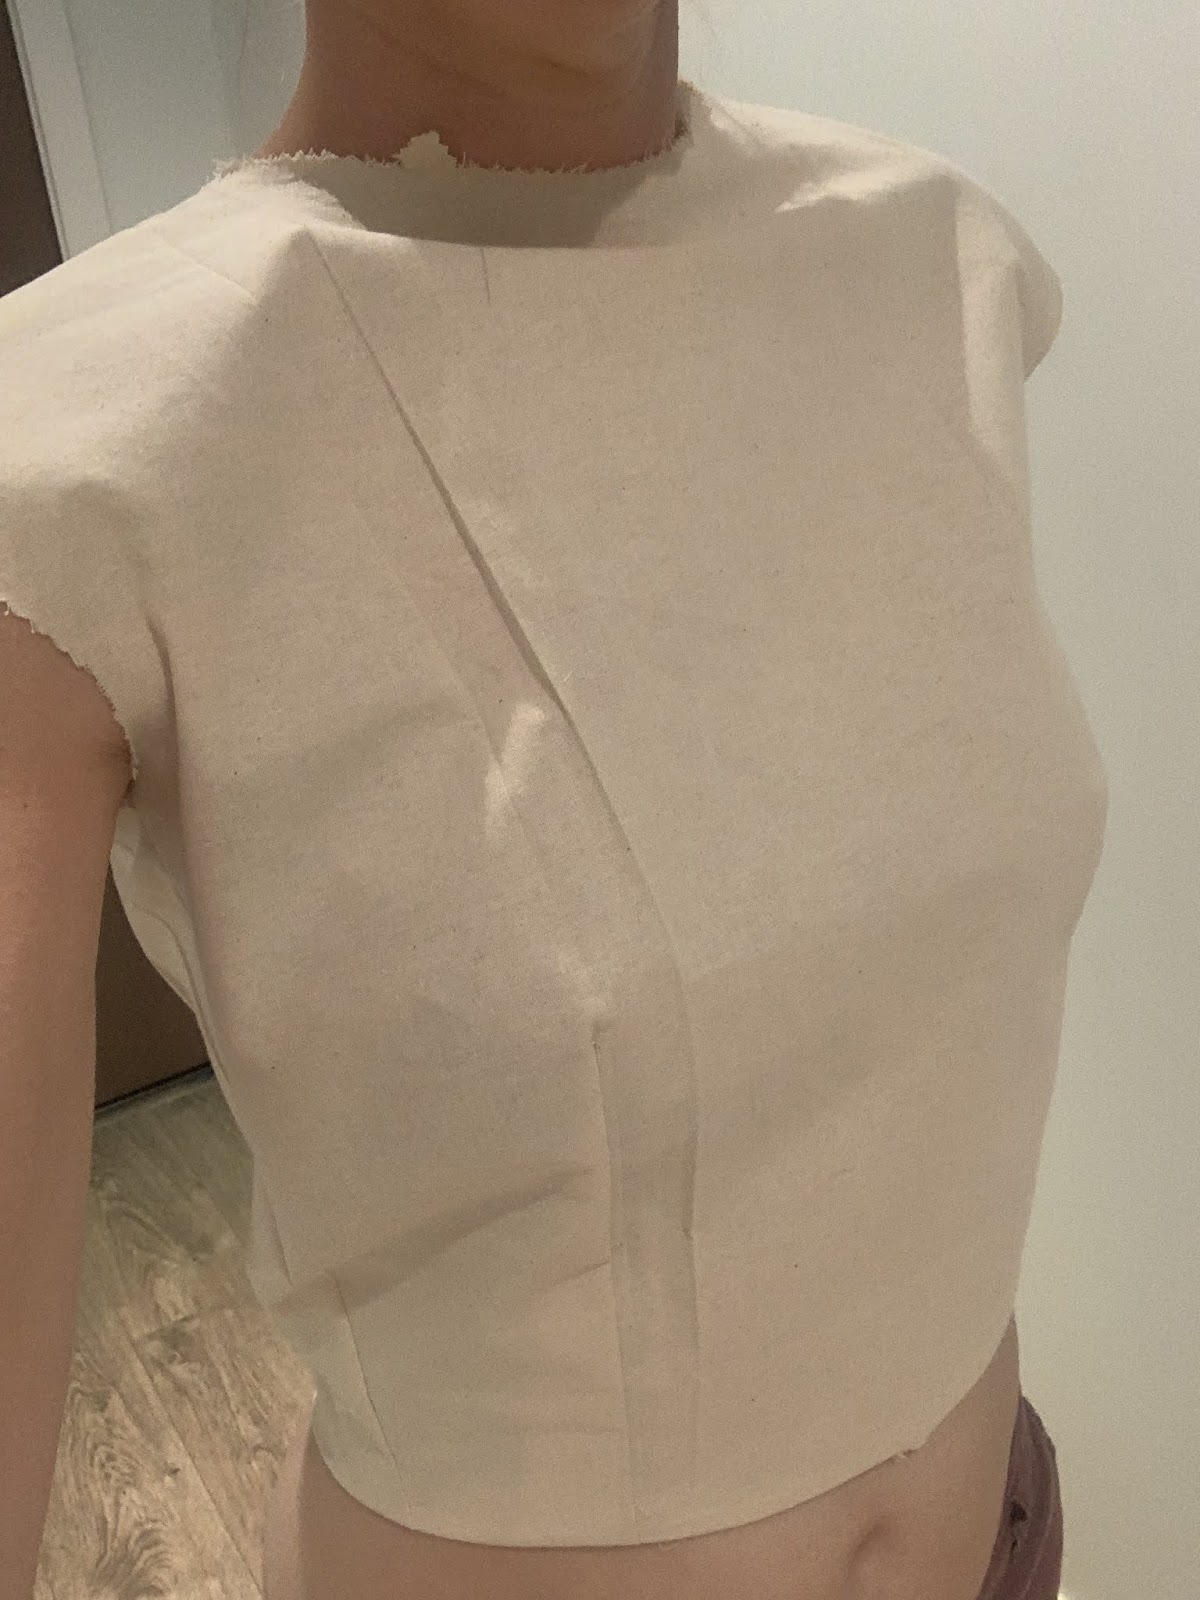
Then it was on to my final prototype, which was on muslin fabric. This is when I extended my pattern about four inches longer to make my shirt long enough to tuck into my skirt. I also tried to figure out how I was going to style the back of the top. The pattern showed a zipper down the middle back, but in the end I went for pearl buttons.
Here is the final prototype:
At this point, it was only three more weeks until our wedding!
After the length was sorted out, I changed another detail for the final top. I did not put in the back darts. Since I was pretty beginner at this point, I wasn’t sure how it would turn out but it worked well!
My final fabric was silk (very hard to sew). I did two layers of silk on the front and back so it wouldn’t be so sheer. I also did a lining of this really nice and soft fabric of which I cannot remember the name. I kept the top simple and minimalistic with a high neckline and back neckline (?) as well. I was very, very stressed out about finishing the shirt properly and not damaging it and many other worries. I did not finish the shirt until the night before the wedding.
I hope you enjoyed this write up and maybe it will inspire you to make a wedding top or dress! All of the stress was definitely worth it when I put on the final product. Here is the final look:

Thank you for reading! ☀️


Comments
Post a Comment